by Thomas Stirling | Apr 9, 2024 | astronomy, astrophotography, photography, space
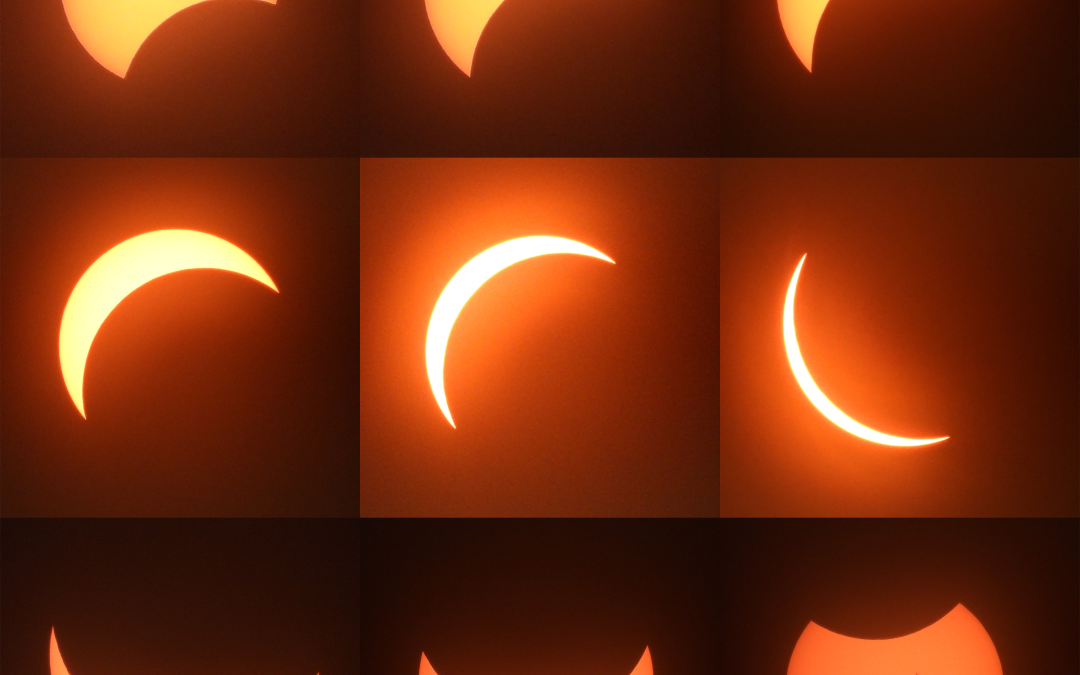
Witnessing the 96% Solar Eclipse from My Backyard Yesterday, I had the incredible experience of watching a 96% solar eclipse right from the comfort of my own backyard. I stayed local for the eclipse because of work and my children’s school, unlike many who travel for...
by Thomas Stirling | Jul 16, 2020 | astronomy, astrophotography, photography, space
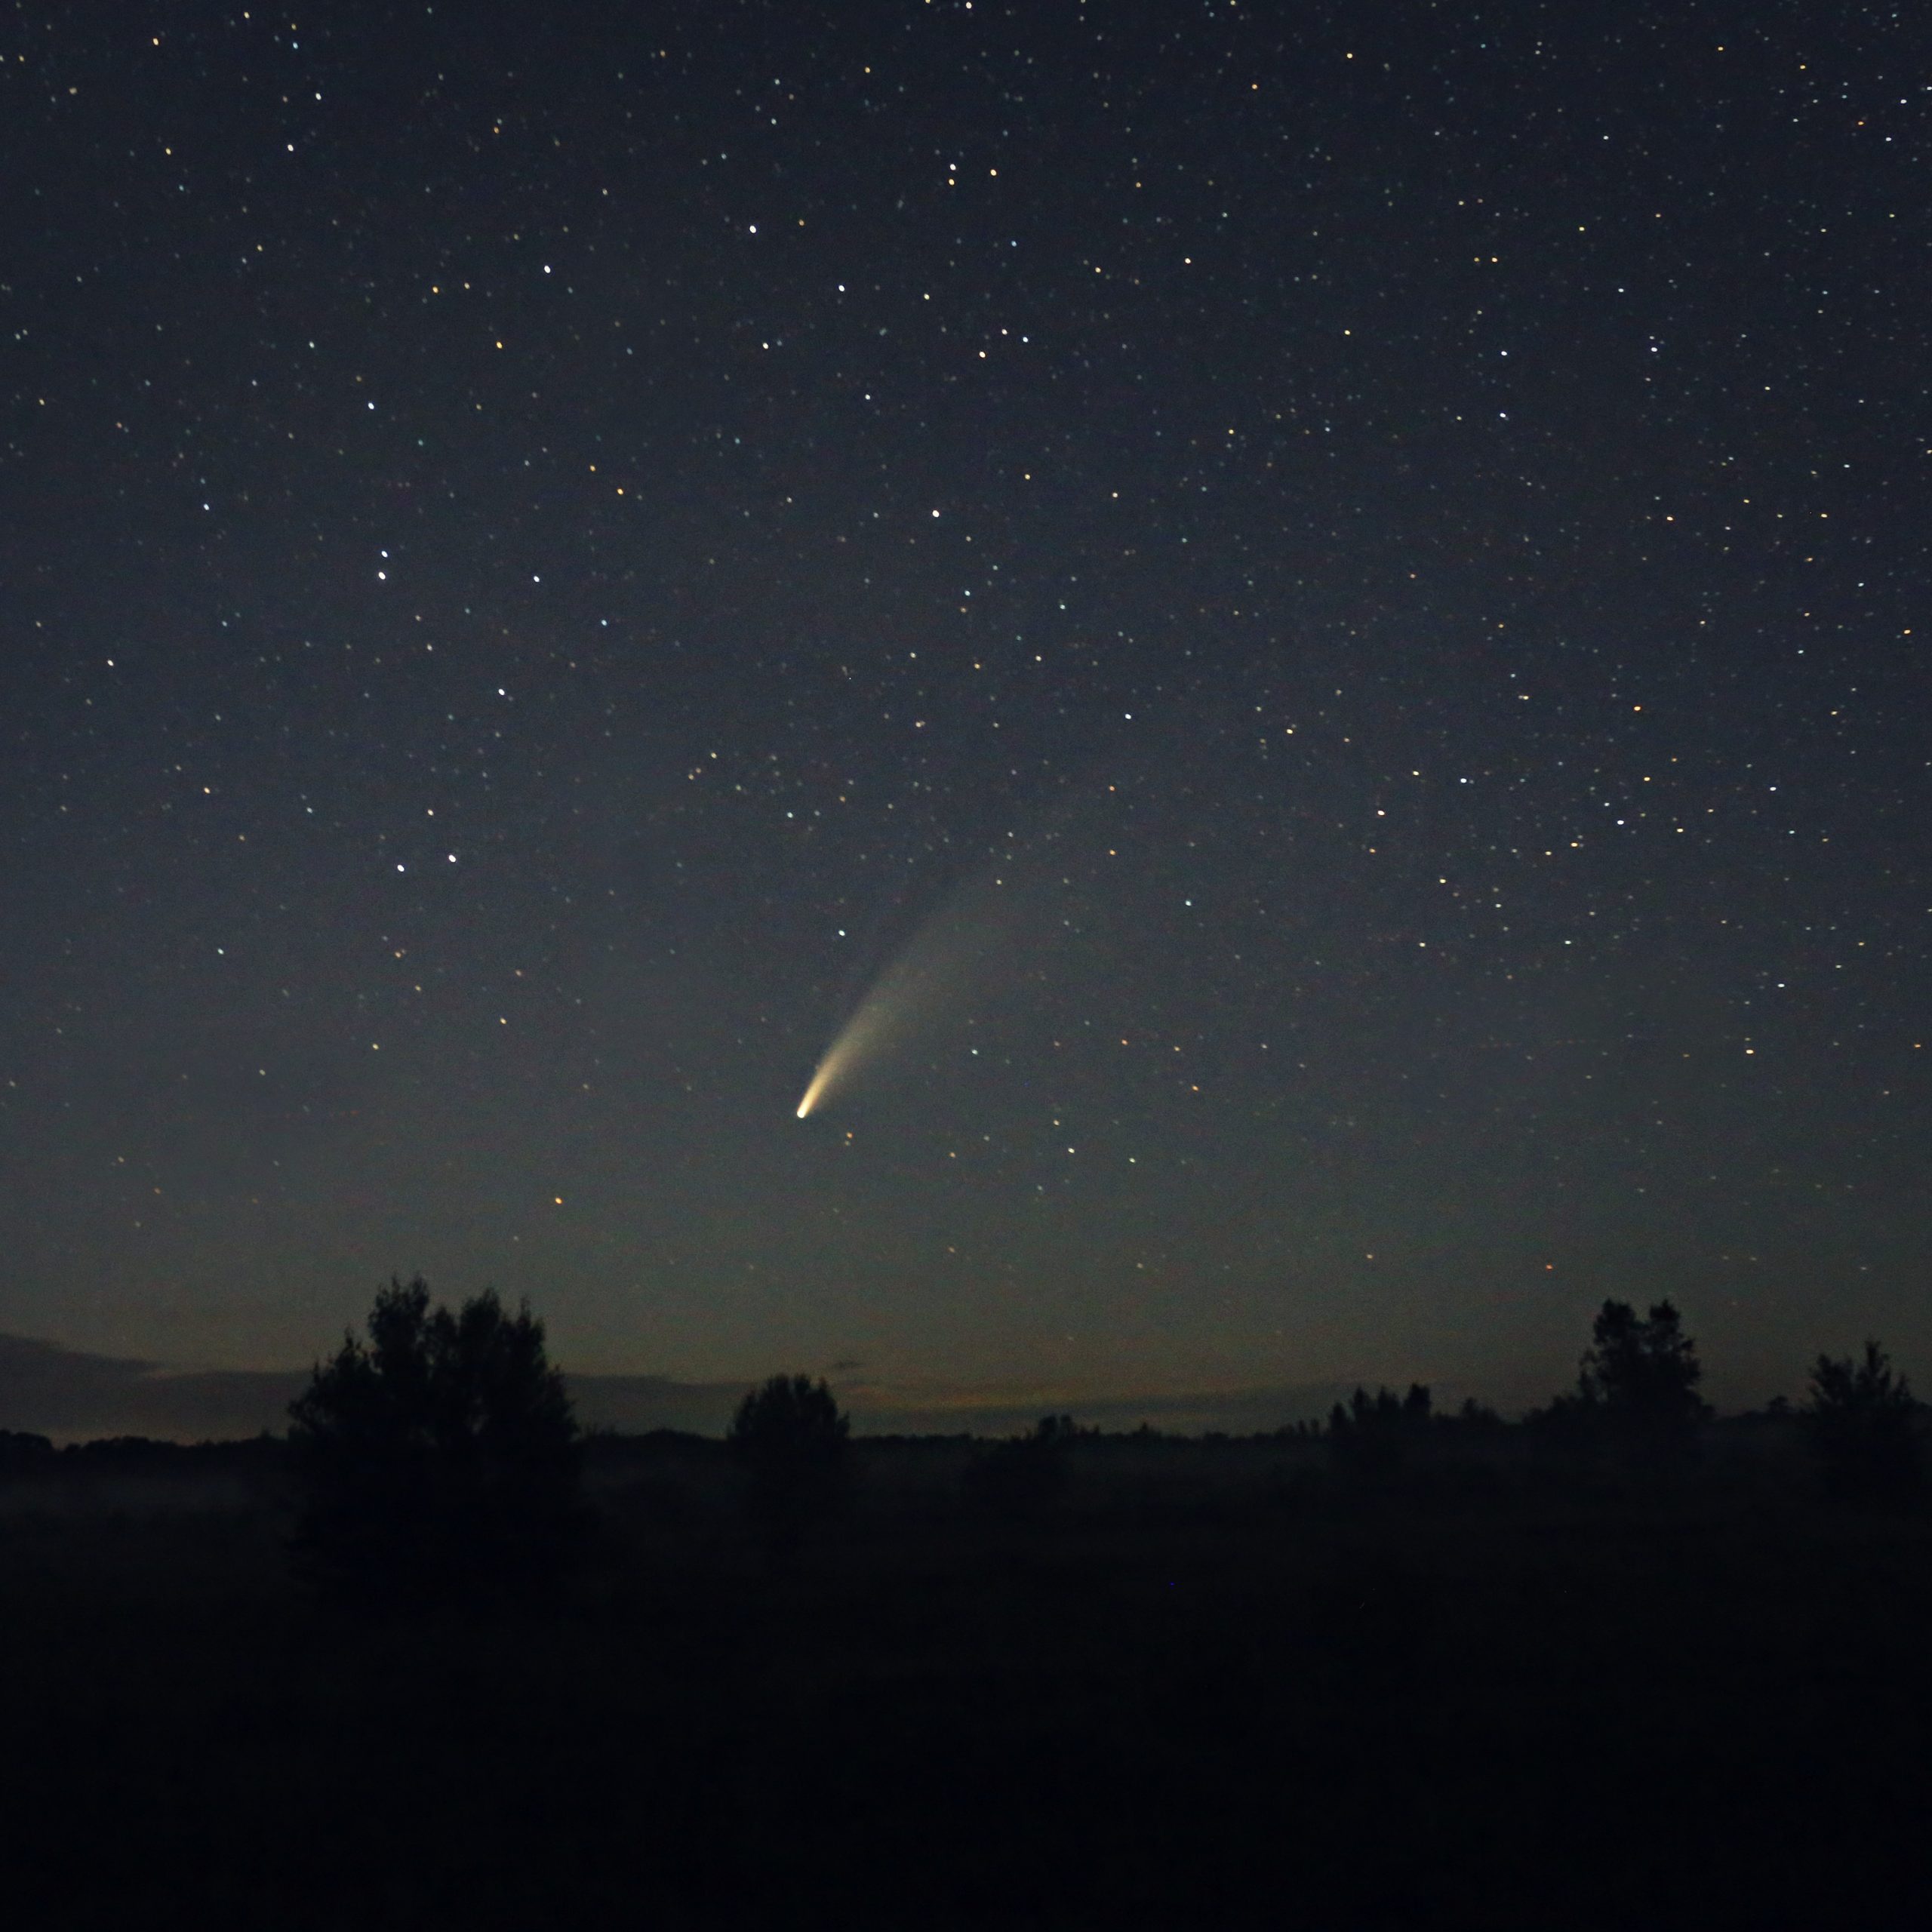
Tonight I headed out on a mission to see and photograph Comet Neowise. Neowise is a fairly recently discovered comet first spotted by the astronomers using the Neowise Telescope. Having seen the great comet of 1997 Hale Bopp as just a teenager, standing in my back...
by Thomas Stirling | Jul 13, 2020 | astronomy, astrophotography, video, videography
Last night I had clear skies and the opportunity to photograph and film Saturn without having to stay up till the middle of the night. Below is just a short clip, but in it you can clearly distinguish the rings of Saturn as it slowly pans across my viewfinder.

by Thomas Stirling | Jun 3, 2020 | astronomy, astrophotography, photography
I recently picked up a Nikon P1000. After having spent almost 15 years taking photos exclusivley with Canon Cameras I felt it was time to cross over and see what all the fuss was about with a good point and shoot Nikon. For the price this camera is awesome. Its a good...

by Thomas Stirling | Aug 14, 2017 | astronomy, astrophotography, photography, timelapse, video, videography
*Note – Some prerequisite knowledge of Adobe Photoshop and basic digital photography will be required. I have been fascinated with the night sky since as long as I can remember, going outside and looking up at the stars makes you feel that your problems –...

by Thomas Stirling | Jul 1, 2016 | astronomy, astrophotography, photography
As promised, below is a photo made from 30 minutes of 30 second exposures stacked in photoshop to show how stars revolve around the north star (Polaris) this photo was taken in conditions that where not ideal as there was still a large moon in the sky illuminating the...